Raspberry Pi SD Card Image is too big for another SD Card
Recently I am working on project involving Raspberry Pi. A couple of months ago I wrote a quick start guide to Raspberry Pi. Now I have another topic to cover that is related to Raspberry and project I am working on. As you know Raspberry Pi does not have hard drive. Instead is used SD card - it loads operating system on SD card, it boots from SD card, it saves data to SD card, etc. And when you work with SD cards from different producers you realize that although cards are equal in size they actually differ with some small bytes. For example I have AData SD card which is 8G but it is slightly bigger that 8G Toshiba SD card. And when I try to save image produced on AData on Toshiba SD card I got error saying that there is not enough space on disk.
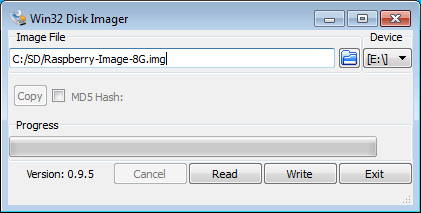
When I needs to read/write an image from/to SD card on Windows I use Win32 Disk Imager. It is very simply and nice to have tool. Here is the error which I got from Disk Imager. Here are two screenshots - first one showing file that I selected and prepared for writing and second one is error which it gives back.

Pay attention to highlighted numbers in second screenshot those are available sectors. Actual image has 15130624 sectors, and SD card where we are going to save it has 15126528 sectors. If you pay closer attention to error message you will see that sector size is 512 bytes. So let’s calculate difference
15130624 - 15126528 = 4096 sectors
4096 * 512 = 2097152 bytes difference
2097152 / 1024 = 2048 kilobytes
With other words this is 2M difference between those 8G SD cards - one of them AData and second one Tohisba. Ant this 2Mb stops you from writing image to another SD card. Of course there is a solution which includes resizing the image under Linux.
First step is to copy that image into Linux. Then you simply run fdisk -l name of image
debianhowto@debian:~/image$ fdisk -l Raspberry-Image-8G.img

Disk Raspberry-Image-8G.img: 7746 MB, 7746879488 bytes
255 heads, 63 sectors/track, 941 cylinders, total 15130624 sectors
Units = sectors of 1 * 512 = 512 bytes
Sector size (logical/physical): 512 bytes / 512 bytes
I/O size (minimum/optimal): 512 bytes / 512 bytes
Disk identifier: 0xa6202af7

                 Device Boot      Start         End      Blocks   Id  System
Raspberry-Image-8G.img1            8192      122879       57344    c  W95 FAT32 (LBA)
Raspberry-Image-8G.img2          122880    15130623     7503872   83  Linux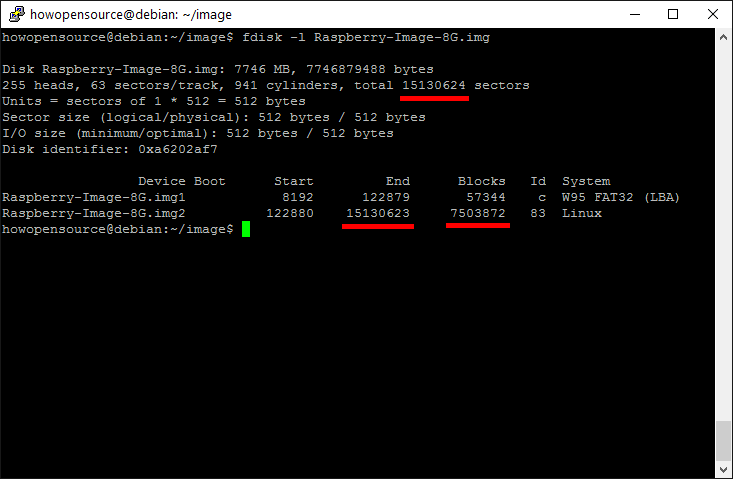
Do not pay attention to heads. track, etc. Those are not valid for SD cards. But pay
attention for total sectors - 15130624 and to size of image - 7746 MB. Note that this
image is expanded. But sometimes I got some unexpanded images. You know when you first
boot into Raspbian first thing that is executed is sudo raspi-config. And from this menu
you can expand files system to use entire space on SD card. When you download and get 4G
image for example and save in over 8G card you have 4G free. They are not used until you
do not run sudo raspi-config. Here are more info about raspi-config. So here how it looks
one unexpanded image. Actually is the same image, but second partition has a half a blocks
(size). And instead to end of 15130623 sector ends 8110079.
debianhowto@debian:~/image$ fdisk -l Raspberry-Image-8G-Not-Expanded.img

Disk Raspberry-Image-8G-Not-Expanded.img: 7746 MB, 7746879488 bytes
255 heads, 63 sectors/track, 941 cylinders, total 15130624 sectors
Units = sectors of 1 * 512 = 512 bytes
Sector size (logical/physical): 512 bytes / 512 bytes
I/O size (minimum/optimal): 512 bytes / 512 bytes
Disk identifier: 0xa6202af7

                              Device Boot      Start         End      Blocks   Id  System
Raspberry-Image-8G-Not-Expanded.img1            8192      122879       57344    c  W95 FAT32 (LBA)
Raspberry-Image-8G-Not-Expanded.img2          122880     8110079     3993600   83  Linux
Why I am writing this is because reading some other manuals on the web you may find that you image does not end at the last sector, but end at the half of sectors or somewhere else. Any way keep that in mind.
Check available space on target SD card
Next step is to check available space on target SD card - where you are going to write image.
So insert SD card into SD card reader/dongle and then plug it into USB on the same Linux machine.
Then you need to verify to which device it maps. For that purpose run dmesg | tail and check output.
debianhowto@debian:~/image$ dmesg | tail
[ 8727.215069] usbcore: registered new interface driver usb-storage
[ 8727.215071] USB Mass Storage support registered.
[ 8728.212952] scsi 6:0:0:0: Direct-Access     Myson    SD/MMC/MS Reader 1.00 PQ: 0 ANSI: 0 CCS
[ 8728.213826] sd 6:0:0:0: Attached scsi generic sg2 type 0
[ 8728.214531] sd 6:0:0:0: [sdb] 15126528 512-byte logical blocks: (7.74 GB/7.21 GiB)
[ 8728.214909] sd 6:0:0:0: [sdb] Write Protect is off
[ 8728.214912] sd 6:0:0:0: [sdb] Mode Sense: 03 00 00 00
[ 8728.215283] sd 6:0:0:0: [sdb] Write cache: enabled, read cache: enabled, does not support DPO or FUA
[ 8728.219054]  sdb: sdb1 sdb2
[ 8728.221659] sd 6:0:0:0: [sdb] Attached SCSI removable disk
As you see my device is attached to /dev/sdb, you may be attached to sda, sdc, etc. If you pay attention to those messages you will see 15126528 512-byte logical blocks: (7.74 GB/7.21 GiB) line. So that’s the number of sectors and, block size and total size of target SD card. But you can check it further with fdisk. Note that in order to access /dev/sdb/ you will need of sudo.
debianhowto@debian:~/image$ sudo fdisk -l /dev/sdb

Disk /dev/sdb: 7744 MB, 7744782336 bytes
239 heads, 62 sectors/track, 1020 cylinders, total 15126528 sectors
Units = sectors of 1 * 512 = 512 bytes
Sector size (logical/physical): 512 bytes / 512 bytes
I/O size (minimum/optimal): 512 bytes / 512 bytes
Disk identifier: 0xa6202af7

   Device Boot      Start         End      Blocks   Id  System
/dev/sdb1            8192      122879       57344    c  W95 FAT32 (LBA)
/dev/sdb2          122880    15126527     7501824   83  Linux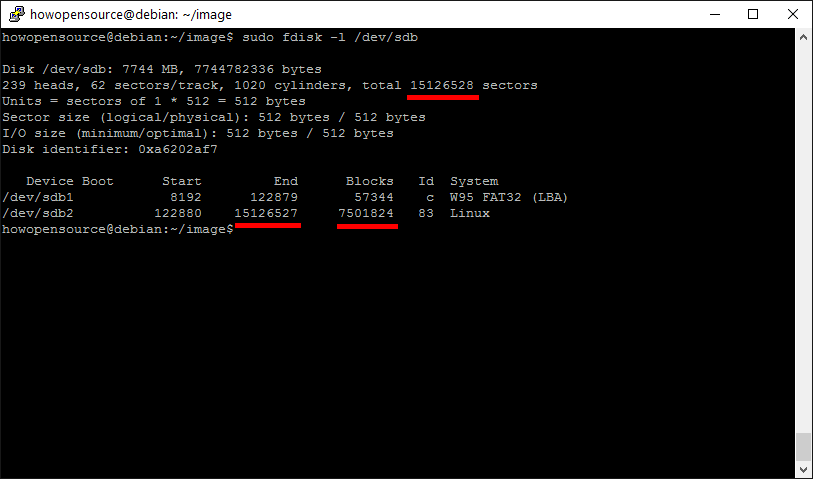
Calculate new size and shrink image file
As you see the most important information that we focus to the moment is sectors - 15130624 - 15126528 = 4096 sectors. Remember that number as we are going to use it couple of times.
Next step is to mount image file with command - losetup
debianhowto@debian:~/image$ sudo losetup -f --show Raspberry-Image-8G.img
/dev/loop0
So image file is mounted to /dev/loop0. You can run fdisk on it and you will
see the same result that from run fdisk on image file itself.
debianhowto@debian:~/image$ sudo fdisk -l /dev/loop0

Disk /dev/loop0: 7746 MB, 7746879488 bytes
255 heads, 63 sectors/track, 941 cylinders, total 15130624 sectors
Units = sectors of 1 * 512 = 512 bytes
Sector size (logical/physical): 512 bytes / 512 bytes
I/O size (minimum/optimal): 512 bytes / 512 bytes
Disk identifier: 0xa6202af7

      Device Boot      Start         End      Blocks   Id  System
/dev/loop0p1            8192      122879       57344    c  W95 FAT32 (LBA)
/dev/loop0p2          122880    15130623     7503872   83  Linux
As you see in this output (and on previous as well) we have two partitions in the file. The first one is boot one. Which we are not going to touch. The second one is data partition - /dev/loop0p2 which we are going to shrink. For that purpose we need to mount only that partition. We are going to use -o or offset parameter of losetup command. But first we need to calculate offset. Get the start sector of second partition which in my case is 122880 and multiply it by 512.
122880 * 512 = 62914560Before to mount second partition we need to unmount image file. First command is to unmount and second to mount only partition that we want to shrink.
debianhowto@debian:~/image$ sudo losetup -d /dev/loop0

debianhowto@debian:~/image$ sudo losetup -f --show -o 62914560 Raspberry-Image-8G.img
/dev/loop0
Now we can run some commands to check file system for example e2fsck.
debianhowto@debian:~/image$ sudo e2fsck -f /dev/loop0
e2fsck 1.42.5 (29-Jul-2012)
/dev/loop0: recovering journal
Pass 1: Checking inodes, blocks, and sizes
Pass 2: Checking directory structure
Pass 3: Checking directory connectivity
Pass 4: Checking reference counts
Pass 5: Checking group summary information
Free blocks count wrong (1158894, counted=1158871).
Fix? yes
Free inodes count wrong (385389, counted=385394).
Fix? yes

/dev/loop0: ***** FILE SYSTEM WAS MODIFIED *****
/dev/loop0: 88814/474208 files (0.1% non-contiguous), 717097/1875968 blocks
When I run this command I got some errors. Of course I want them to be fixed. So when program asks me I confirm.
Next step is to shrink file system. For that purposes we are going to use resize2fs command. It accepts new size with bytes, megabytes, gigabytes or sectors. Sectors is easy, because we just know the size of sectors of old, new one and difference. So Start sector is 122880, End sector is 15130623. So the size in sector is:
15130623 - 122880 = 15007743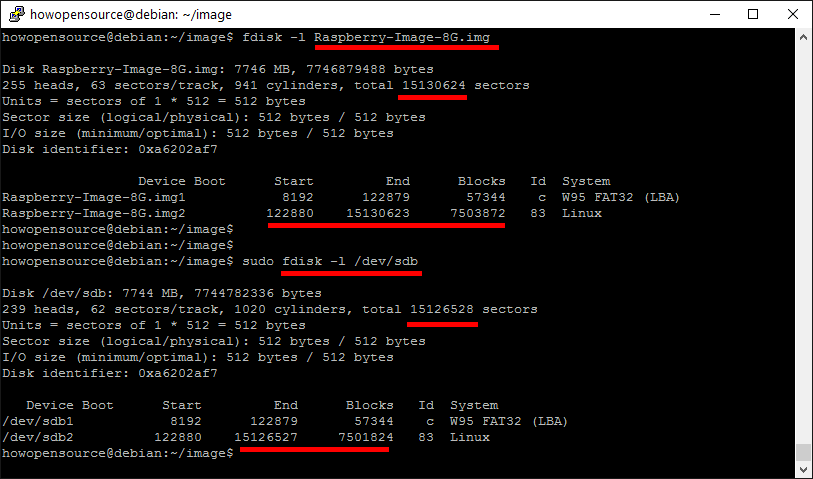
Difference is 4096 sectors. So we need to subtract from size that number.
15007743 - 4096 = 15003647And we need to execute the command.
debianhowto@debian:~/image$ sudo resize2fs -p /dev/loop0 15003647s
resize2fs 1.42.5 (29-Jul-2012)
Resizing the filesystem on /dev/loop0 to 1875455 (4k) blocks.
The filesystem on /dev/loop0 is now 1875455 blocks long.
Now we can check again for errors file system.
debianhowto@debian:~/image$ sudo e2fsck -f /dev/loop0
e2fsck 1.42.5 (29-Jul-2012)
Pass 1: Checking inodes, blocks, and sizes
Pass 2: Checking directory structure
Pass 3: Checking directory connectivity
Pass 4: Checking reference counts
Pass 5: Checking group summary information
/dev/loop0: 88814/474208 files (0.1% non-contiguous), 717097/1875455 blocks
Finally do not forget to unmount file.
debianhowto@debian:~/image$ sudo losetup -d /dev/loop0At that point we are ready to write image from Linux. But still we will not be able to write it with Win32 Disk Imager. Even if we write it from Linux we will get error that size of image file is bigger that the SD card. But it will written and it will work. And second problem is that partition info is not correct. It will work, but if you try to edit with gparted for example it will give you some strange errors. So let’s see how to fix those problems.
Fix partition info
First we need to mount entire file again, as we did it in the beginning.
debianhowto@debian:~/image$ sudo losetup -f --show Raspberry-Image-8G.img
/dev/loop0
Then we need to run command that shows partition info.
debianhowto@debian:~/image$ sudo sfdisk -d /dev/loop0
# partition table of /dev/loop0
unit: sectors

/dev/loop0p1 : start=     8192, size=   114688, Id= c
/dev/loop0p2 : start=   122880, size= 15007744, Id=83
/dev/loop0p3 : start=        0, size=        0, Id= 0
/dev/loop0p4 : start=        0, size=        0, Id= 0
Remember number 15007744, so we need to subtract from it again 4096 and to save back partition info. For that purpose output that info into file. Then edit that file and then run command to save it back.
debianhowto@debian:~/image$ sudo sfdisk -d /dev/loop0 > partition.txtEdit partition.txt and replace 15007744 with 15003648 (which is 15007744 - 4096). So file will look like this:
debianhowto@debian:~/image$ sudo sfdisk -d /dev/loop0 > partition.txt
debianhowto@debian:~/image$ vi partition.txt
debianhowto@debian:~/image$ more partition.txt
# partition table of /dev/loop0
unit: sectors

/dev/loop0p1 : start=     8192, size=   114688, Id= c
/dev/loop0p2 : start=   122880, size= 15003648, Id=83
/dev/loop0p3 : start=        0, size=        0, Id= 0
/dev/loop0p4 : start=        0, size=        0, Id= 0
And final command is to import back this partition info with the same command.
debianhowto@debian:~/image$ sudo sfdisk /dev/loop0 < partition.txtSo now problem with partition info is fixed and gparted will not complain if you want to edit partitions with it. But as I said you can skip this step. It will work without it.
Final step is to unmount file.
debianhowto@debian:~/image$ sudo losetup -d /dev/loop0Shrink the file size
To the moment we shrink file system size. But size of image file is still the same. Trying to write it to SD card with Win32 Disk Imager will not be possible. Still you can write it to the SD card with Linux dd command. It will give you an error, you can ignore it and it will work. Here is the command to write file to SD card and you can see the error. But as you see it copy file up to size that can fit to SD card.
debianhowto@debian:~/image$ sudo dd if=Raspberry-Image-8G.img of=/dev/sdb bs=4M
dd: writing `/dev/sdb`: No space left on device
1847+0 records in
1846+0 records out
7744782336 bytes (7.7 GB) copied, 1521.76 s, 5.1 MB/s
debianhowto@debian:~/image$ sudo sync
To avoid that we need to shrink the file size itself. For that purpose we are going to use truncate command. Remember 4096 sectors, multiply them by 512 and that is size that we need to subtract from current size. To check file size type.
debianhowto@debian:~/image$ ls -la
total 37826592
drwxr-xr-x 2 debianhowto debianhowto       4096 Mar 19 18:16 .
drwxr-xr-x 4 debianhowto debianhowto       4096 Mar 19 18:16 ..
-rw-r--r-- 2 debianhowto debianhowto 7746879488 Mar 19 18:20 Raspberry-Image-8G.img
Image file size as you see is 7746879488 bytes. New size should be:
7746879488 - 4096 * 512 = 7744782336And here is the command that you need to execute.
debianhowto@debian:~/image$ truncate -s 7744782336 Raspberry-Image-8G.img
debianhowto@debian:~/image$ ls -la
total 37822496
-rw-r--r-- 2 debianhowto debianhowto 7744782336 Mar 19 18:33 Raspberry-Image-8G.img
As you see image is truncated to it’s new size. As I said this step is not necessary. But it will give you possibility to write image with Win32 Disk Imager or with dd Linux command without giving you warnings. Format of command is simple. From where to copy to where to copy and parameter bs specifies block size - it is not mandatory. If not specified it will read and write block by one by one. Setting it to 4 megabytes will speed up a little bit process. What we are executing here is copy file Raspberry-Image-8G.img to device /dev/sdb using block copy. And because size of file should be the same as size of target SD card we will not get error at the end.
debianhowto@debian:~/image$ sudo dd if=Raspberry-Image-8G.img of=/dev/sdb bs=4M
1846+1 records in
1846+1 records out
7744782336 bytes (7.7 GB) copied, 1535.56 s, 5.0 MB/s
At the end you have to run sync command to make sure result of dd command is synced and then you can unplug SD card from Linux box and put it into Raspberry.
debianhowto@debian:~/image$ sudo sync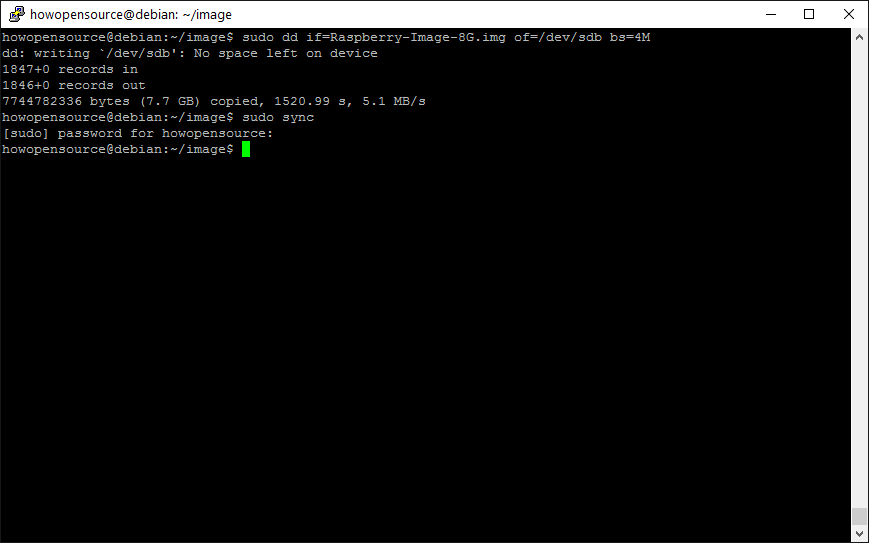
Hope this tutorial helps you to understand necessary operation to works with SD cards and file systems on Linux. Principles are the same and you can apply it over any other media - flash drive, hard drive, etc.